Learning how to be a creative engineer will boost your skills, empowering you to tackle even the most mind-boggling challenges.
So, let’s explore the 7-step method together! But first, a quick chat about varying levels of creativity among engineers.
Is everyone equally creative in engineering?
Guess what? We’re not all born with the same creative chops in engineering. Just like NBA players, engineers come in all shapes and sizes, with various talents:
- Rapid spatial reasoning
- Memory capacity
- Pattern recognition
In the NBA, there are superstars like LeBron James and countless less-known players. They differ in things like height, weight, wingspan, athleticism, durability, court vision, memory, and grit. So, don’t sweat it if you’re not as creative as the engineering elite. The goal is to unlock your full creative potential, something many engineers overlook.
Now let’s jump into the 7-step method for becoming a creative engineer, and be sure to scope out my 20 tips for maximizing your engineering creativity!
The significance of creativity in engineering
Engineers often grapple with a myriad of tough problems that demand inventive solutions. Take the design and construction of the Golden Gate Bridge, for example.
Engineers had to create a sturdy and massive bridge spanning turbulent, deep, uncharted waters. Considering the era, this project was mind-blowing. It wasn’t as easy as plopping down a few pillars and pouring a concrete platform. Engineers had to tap into their creativity to find a solution.
With that said, I’ll use the Golden Gate Bridge as the anchor of our conversation on how to be a creative engineer.

Important Note: The Golden Gate Bridge links San Francisco to Marin County. Discussions about building a bridge across the Golden Gate Strait started as early as 1820.
In 1921, engineer Joseph B. Strauss submitted a design proposal for the bridge. Construction kicked off on January 5th, 1933, and the bridge officially opened on May 27th, 1937.
#1 Scrutinize the project work scope and pinpoint the problems
Constructing a bridge across the Golden Gate Strait seemed impossible at one point. In fact, it was dubbed as:
“The bridge that couldn’t be built.”
Nonetheless, a group of fearless engineers tackled this colossal project head-on. Some of the extreme design variables they faced included:
- Forceful water currents
- Deep, dark, chilly, and murky waters
- Intense, biting winds
- Never-ending thick fog
- The San Andreas Fault lurking 7 miles offshore
- Less-than-ideal bedrock location
- Constant load from vehicles traversing the bridge
This step of outlining the project is crucial. It hones your creativity on the most important areas and identifies where you need to gather data. The more data you have, the more creative you’ll be.
For instance, the Golden Gate Bridge demanded extensive Earth analysis for its foundation design. Engineers had to collect loads of data around the Golden Gate Strait, setting the design parameters for them to work with.
In a nutshell, identify and list all your project variables, while spotlighting potential problems. No stone should be left unturned!
#2 Closely analyze the project problems
Once you’ve pinpointed your problems, dive into researching and analyzing them thoroughly. Understand the gravity of their impact on your design. If not, you could face an engineering catastrophe.
For instance, wind plays a huge part in bridge design. If you’ve ever biked across the Golden Gate Bridge, you’re no stranger to the gusts. Engineers had to account for static wind load—the horizontal force that pushes a bridge sideways. The design needed to withstand this force to avoid instability and potential collapse.
They also had to factor in dynamic wind loads—the aerodynamic interaction between the bridge and air flowing past structural elements.
Lastly, they addressed the following wind-related concerns for the construction workers:
- Precision work becoming a challenge
- Tools slipping from workers’ hands
- Cranes and towers toppling over
- Workers falling from dizzying heights
- Materials and debris striking workers
- Dust irritating workers’ eyes
- Breathing and hearing difficulties
- Rising construction costs
A creative solution is only as solid as the constraints you need to overcome. With the Golden Gate Bridge, a suspension bridge of this magnitude had never been built before. Engineers had to size up the beast before unleashing their creativity.
#3 Organize the project problems to forge a design path
Now that we’ve dissected our problem, we’re armed with a treasure trove of data and insight. It’s time to pragmatically carve out a design path.
Let’s focus on the bridge towers, as they shoulder the weight of the entire structure and shape the other design elements.
Having grasped the bridge loads, engineers needed to decide on the tower placement. The north tower, located onshore, was a no-brainer after a thorough geological analysis. It rests on a bed of sturdy chert rock on the Marin Headlands’ shoreline.
The south tower, however, was a whole different ball game. The design called for the tower to be built 1100 feet offshore, submerged 100 feet underwater on bedrock. This sparked heated debates during the design process due to the construction challenges. Yet, it was crucial to support the bridge’s colossal weight and withstand the relentless wind loads.
Without proper analysis, engineers might have placed the south tower closer to the shore, endangering the bridge. To sum up, follow these steps:
- List all the problems, considering your analysis from Step #2
- Categorize your problems by importance (e.g. tower, cables, and construction workers)
- Rank the problems by the level of difficulty
- Prioritize the gathered project data (e.g. wind speed is more crucial than ambient temperature)
Your most critical problem will become the foundation you first design around.
#4 Brainstorm design solutions for the project
With your design compass set, it’s time to let your imagination run wild and brainstorm solutions. That is, assuming you’ve nailed the previous steps. Otherwise, you might end up solving a problem that’s not even part of your project.
For the Golden Gate Bridge, after settling on tower placement in Step #3, engineers needed extra support to stabilize the deck. The initial decking support design idea, however, left much to be desired.
In 1921, chief engineer Joseph Strauss proposed a design dubbed ugly by local press. The bridge design featured a suspension span section, with cantilever trusses providing support on both ends.
Fast forward to 1929, Leon S. Moisseiff and O.H. Ammann suggested a full suspension bridge design. Nevertheless, Joseph Strauss kept his original idea on the table.
The more design options you can weigh, the richer your data pool will be for comparing and contrasting, leading to a well-informed decision.
#5 Picking a design solution for the project
At this stage, we finally choose a solution from all the ideas presented in Step #4. To do so, you need to assess each solution based on the following criteria:
- Engineering feasibility
- Compliance with project specs
- Environmental impact
- Construction aesthetics
- Design and construction costs
- Design and construction timelines
- Worker and public safety
Once you’ve picked a solution, you must direct your full attention to it. There’s no room for entertaining other ideas; otherwise, progress will stall. Plus, you usually only have the resources to chase one idea.
Sometimes, though, the best-laid plans might fizzle out. In such cases, you’ll need to pivot and either pick a previously brainstormed idea or circle back to Step #4.
The Golden Gate Bridge and the deflection theory
In 1929, Leon S. Moisseiff and O.H. Ammann persuaded Strauss to adopt the full suspension bridge design—the iconic structure we know and love today in San Francisco.
Engineers chose this design due to the deflection theory, a crucial theory used to predict and analyze the amount of movement the bridge deck under load could endure.
Steps #2 and #3 also highlighted the tremendous loads the bridge would face, further nudging engineers to realize it wasn’t just the bridge’s weight causing deflection but also wind, earthquakes, and heavy traffic.
Without considering all bridge loads, engineers might have overlooked the deflection theory, just one method used to calculate the load-carrying capacity of bridges.
Fortunately, Strauss’ team steered clear of an unattractive and costly bridge design without compromising safety.
Important Note: In structural engineering, deflection is vital for design. It refers to the movement or change in geometry of a solid object in response to applied forces.
The deflection theory is a mathematical model that calculates how a bridge’s deck and curved cables work together to carry loads. This results in the roadway flexing safely in the wind due to its thin and flexible design, reducing hazardous vibrations from stress.
The main cables on the bridge absorb a significant amount of wind pressure, which is then transmitted to the towers. The towers, in turn, absorb this energy.
The secret sauce is the curve of the main cables, allowing loads to be easily carried compared to stiffer bridges. Consequently, the deflection theory demonstrates how suspension bridges excel by carrying more loads while being lighter, more elegant, and safe. On top of that, they cut construction costs by minimizing the materials needed.
#6 Bring the chosen design solution to life
With a winning idea in hand, it’s time to dive into the nitty-gritty of design: crunching numbers and drafting detailed drawings.
For instance, let’s circle back to the Golden Gate Bridge’s south tower. Engineers and geologists performed analyses and discovered the following:
- The south pier foundation needs over 125 thousand cubic yards of concrete.
- Dynamite is required to blast away the uneven rocky bottom and create a solid base for the piers.
- The south pier footing must extend 20 feet into the bedrock.
- The suspension tower will soar 746 feet above the ocean and connect the two main cables spanning 7,650 feet.
During this phase, you might also build a mockup design to double-check your calculations. For example, engineers constructed a model suspension tower to verify their force calculations using a civil engineering testing machine.
This hands-on analysis helps you confirm previous steps and spot any issues that might have slipped through the cracks in Step #1.
#7 Reflect on the project after completion
Once your project is wrapped up, take a moment to evaluate the entire process. This period of reflection enables you to pinpoint valuable lessons for future endeavors, empowering you to tackle even bigger and bolder challenges.
I like to jot down everything I’ve learned after a project, capturing my thought processes and problem-solving strategies before they fade from memory.
For instance, the Golden Gate Bridge’s design taught engineers the following:
- Full-suspension bridges are excellent options for long spans subjected to various loads.
- Bridge towers can be safely anchored to the ocean floor.
Furthermore, the Golden Gate Bridge also provided insights into proper safety requirements, including:
- Safety lines and hard hats
- Glare-free goggles for visibility against the Sun’s reflection off the water
- Special diets to combat dizziness from working at great heights
- Sauerkraut juice to tackle hangovers
- An onsite field hospital for immediate treatment of injuries
- A safety net placed under the bridge to catch falling workers
These safety measures were unprecedented in bridge construction, making future projects significantly safer.
“How to be a creative engineer” wrap up
Creativity in the face of complex problems doesn’t just appear out of thin air like in cartoons. There’s no instant lightbulb moment.
Instead, you need a deep understanding of your project’s scope and challenges. Only then can you weave your thoughts into a creative solution. After all, creativity is a process that thrives on data. And the more data you have, the more creative you’ll become.
So, follow these 7 steps on how to be a creative engineer to collect data and successfully execute projects.
What advice would you give on becoming a creative engineer? Do you think everyone has the potential to be a creative engineer?
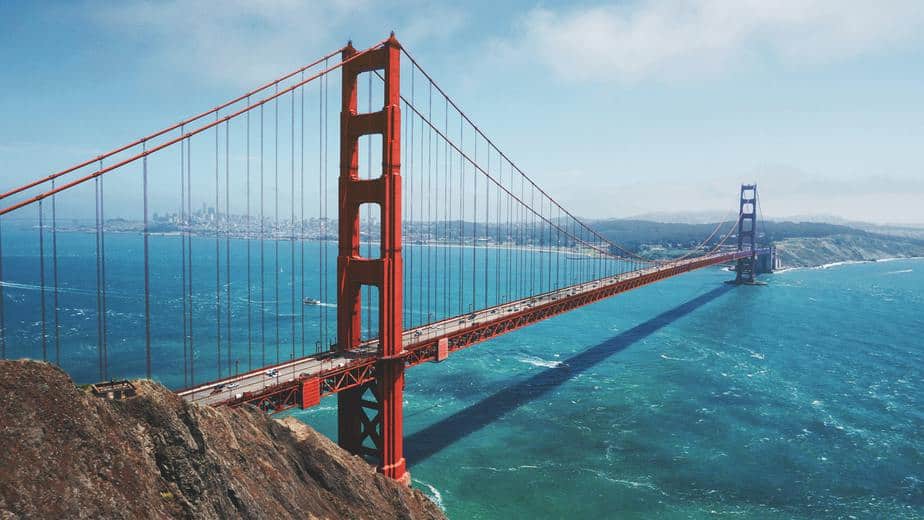
Featured Image Photo Credit: Maarten van den Heuvel (image cropped)