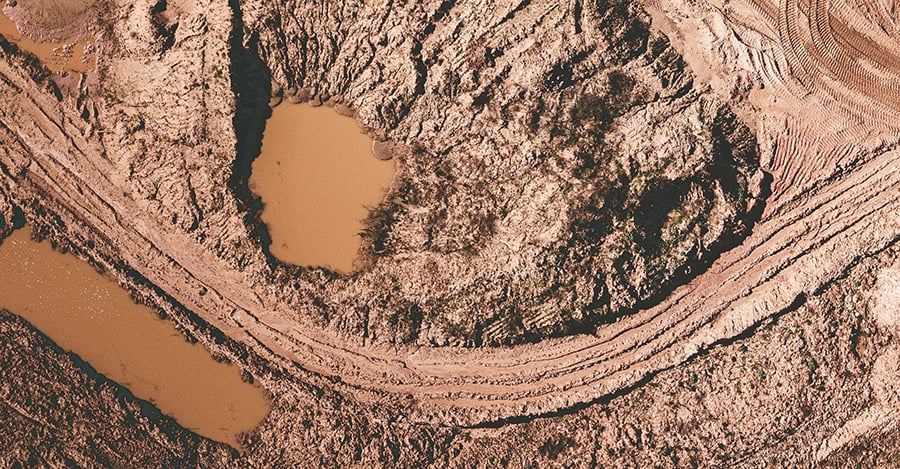
How to dewater a construction site? The method you pick really depends on the unique blend of geology and hydrology at your site.
Every construction site is like a fingerprint, distinct in its own way. But regardless of those differences, our main goal remains the same: kick that groundwater or surface water to the curb, and clear the construction zone!
Now, let’s dive into some handy dewatering tips to get you started on the right foot.

Important Note: Dewatering keeps equipment, soil, and workers safe. It creates dry and stable conditions for those operating heavy machinery while also keeping project budgets in check. Water can flood excavations, grind work to a halt, erode land, and wreck foundations.
That’s why dewatering usually comes into play in situations like these:
- Water piling up in trenches and excavations
- Soggy spots with limited slopes
- High water table zones
- Rainwater seeping into excavated areas
- Subsoil water levels making foundation building a challenge
General construction site dewatering tips
Here are some general dewatering pointers to keep your project running smoothly:
- Abide by all the latest local, state, and federal agency rules and regulations.
- Secure a permit for disposing of collected water.
- Don’t dewater during heavy rain—it just won’t work.
- Stay away from dewatering in eroded areas.
- Find a safe discharge spot before dewatering and watch for erosion.
- Investigate the water table at your construction site to pick the best dewatering method.
- Don’t thoughtlessly dump water into sloped terrain.
- Remove sediments from the dewatering process. Based on the particle properties, you might need to use specific filters like gravity bag filters, cartridge filters, or sand-media particulate filters.
- Test the collected water for contaminants to figure out how to dispose of it.
- Make sure water removal doesn’t mess with construction conditions. Pulling water from soil changes its characteristics.
- Inspect the dewatering operation daily. Keep an eye on filter conditions, pump operations, outlet conditions, and soil conditions.
Important Note: Always start with a geotechnical and groundwater site investigation before dewatering. This helps avoid soil issues while ensuring an effective dewatering process.
The investigation will reveal whether your site has surface water or groundwater. You’ll also find out about any sediments you need to separate and if the water has contaminants like grease, oil, paint, or acids.
#1 Gravity
If your project site has slopes, this is the simplest and most cost-effective method.
Use a gravity drain to channel water to your discharge area. The drainage channels you create will steer water away from the high points at your site.
The downside? If your channel is small, it takes a long time to drain. This method isn’t ideal if you have a ton of water to drain or if your excavation area is deep.
#2 Sump pump
Sump pumping is your go-to method when dealing with small amounts of water.
Picture this: you first dig out an area below grade, creating a space for groundwater to seep into. This little pit, called a sump, collects the water, which is then pumped out. The catch? There’s a risk of the sump’s sides collapsing if the head is too high or the slopes too steep. And if heavy rains or inflows hit, it’s not the best solution. But, it’s fantastic for quickly laying a footing in a damp spot.
Imagine you’ve got a 20-foot by 20-foot excavation area. You’d first dig 10-feet below grade for that area. Next, you’d make the sump deeper than 10-feet where the structure foundation won’t be placed. Since the sump is below the excavation area, all the water collects in it. As you work, you continuously pump out the water in the sump, stopping only once the foundation’s concrete sets.
Important Note: To clear water from an excavation, dig a small sump, place a perforated pipe inside, and surround it with a suitable grade of stones. Then, put the sump pump inside the perforated pipe. This approach is common when the soil is super loose and wet, helping you avoid sump side collapses and blockages at the sump pump’s inlet. Keep in mind, though, the water may still contain some silt.
#3 Wellpoint system
This versatile method is used for most soil and hydraulic conditions to lower groundwater table levels. It’s especially popular in construction projects that require constant water discharge.
For instance, you’d install wellpoints parallel to a pipeline trench that continually collects water. Start by drilling small wells around your excavation area, then place a screen around a suction tube in each well to stop soil from getting in. The tube connects to a riser pipe, which feeds into a common header pipe that’s hooked up to a vacuum pump. This pump then sucks up the water from each connected wellpoint.
But here’s the catch: since this method relies on suction to collect water, your wells can only be so deep. After about 20 feet, it becomes ineffective. To go deeper, you’ll need a multi-stage wellpoint system.
Important Note: With all pumps, make sure the pump outlet faces away from the excavation area to prevent water from flowing back in. And don’t forget to turn off the pumps when the well is nearly empty, or you’ll end up sucking up a bunch of silt.
#4 Eductor Wells
This closed-loop, pressurized system creates a local vacuum to extract water from wellpoints.
Using the venturi principle, high-pressure water circulates through eductors at the bottom of each well. This causes the well bottom pressure to drop, pulling water through the riser pipes.
Unlike the wellpoint method, there’s no real depth limit here—you can go as deep as 150 feet! Plus, this technique works wonders with soils that don’t let much water pass through, like clays and silt.
#5 Deep wellpoint
This is a powerful dewatering method.
Imagine you’re working on an excavation project and the groundwater table is higher than your dig site. Or maybe, you need to remove massive amounts of water quickly and repeatedly – say, in areas with highly permeable sand and gravel. That’s where deep wellpoint comes to the rescue, getting the groundwater out as it swiftly refills.
Here’s how it works: you drill wells with casings around your excavation site to maintain the well’s shape. Next, place submersible pumps at the bottom of each well shaft. Gravity does its thing, pulling groundwater into the wells, and then you pump it out.
#6 Heavy machinery
Sometimes, you can rely on big machines to scoop out water and dump it elsewhere. If you’ve got machines on-site and your excavation area isn’t too deep, this becomes a viable option. It’s particularly handy when most of the water is already gone, leaving just silt behind.
As a pointer, use a bulldozer to push the softer silt to one side of the construction area. Then, use a loader to relocate the silt.
Important Note: Be cautious when using heavy equipment, and make sure your machinery doesn’t get stuck. Always start from one side of an area, and use an excavator to fling the mud into a corner. Then, scoop it out from there. Once you have enough open space, feed the excavator with a bulldozer.
#7 Other dewater methods at construction sites
Here’s a quick list of other dewatering techniques you can consider:
- Deep well construction
- Artificial ground freezing
- Chemical soil spraying (i.e. destabilizing fine particles to form a cake)
- Construction of a cofferdam (i.e. temporary enclosure around a body of water)
- Geotextile tubes (i.e. large dewatering bags acting as containment structures)
- Electroosmosis (i.e. applying voltage to dewater loose soils)
Ultimately, the best dewatering method for your construction site depends on your project’s specifics and budget.
Water discharge location options
You’ve got a bunch of choices when it comes to where to discharge your water. Each option has its pros, cons, and costs. Here’s a rundown of some possibilities and factors to keep in mind:
Discharge on-site
The simplest method is to release the water on your own land, either repurposing it or letting it evaporate. Just make sure the water is pollutant-free before discharging it on-site.
If you opt to store the water, ensure it’s pollutant-free and stored in a safe, secure location on your site. Depending on your location, you might need a permit.
Discharge to nearby land
Get to know your neighbors! Find out who owns the land next to your site and strike a deal to discharge the water on their property. Who knows – they might need extra water!
Make sure to include an assessment of pollutants and sediments in the water in your agreement.
Discharge off-site
Transport the water to an off-site location using containment tanks. For instance, you could take it to a farm for irrigation purposes.
Off-site water relocation depends heavily on water quality.
Sewer system discharge
If the water is low in pollutants, this is a convenient option. Just channel the water through the local sewage system. Remember, you’ll need to test the water and get a permit from the local authorities first.
Off-site treatment
Suppose you stumble upon some nasty pollutants in the water. In that case, off-site treatment becomes your go-to solution. You’ll have to haul that contaminated water to a treatment facility where they’ll work their magic and strip those pollutants out. After that, you can figure out your next move.
“How to dewater a construction site?” wrap up
Dewatering is a crucial aspect of almost every construction project. Ignore it, and you’re playing with fire. Water can flood your excavated areas, wreck your equipment, and even cause structures to crumble. The result? Your workers – and eventually the public – are put in harm’s way.
So, take your time, and choose the best dewatering method based on your site’s soil conditions and water table. With a safe and ready-to-roll construction site, you can confidently tackle your work.
How do you dewater a construction site? What obstacles have you faced in the dewatering process?
Author Bio: Koosha started Engineer Calcs in 2019 to help people better understand the engineering and construction industry, and to discuss various science and engineering-related topics to make people think. He has been working in the engineering and tech industry in California for well over 15 years now and is a licensed professional electrical engineer, and also has various entrepreneurial pursuits.
Koosha has an extensive background in the design and specification of electrical systems with areas of expertise including power generation, transmission, distribution, instrumentation and controls, and water distribution and pumping as well as alternative energy (wind, solar, geothermal, and storage).
Koosha is most interested in engineering innovations, the cosmos, sports, fitness, and our history and future.